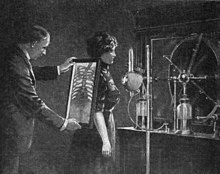
Entry #5: The Image Intensifier
Whether you're using a mobile or fixed fluoroscopy unit, each comes equipped with an image intensifier, sometimes called an II. Before the invention of image intensifiers, images produced by fluoroscopes were very dim and difficult to see. Exams had to be performed in very dimly lit or dark rooms to activate the radiologist's scotopic vision, or "night vision." Scotopic vision uses only the rods of the eyes to perceive light, essentially making your vision black and white. This was not only hard on the radiologist's eyes but required time for them to "adjust" their eyes. This slowed down the workflow. Scotopic vision is also less accurate than using photopic vision which used the cones of the eye.
With the birth of the image intensifier, radiologists no longer had to adapt their own eyesight to a dim room to look at even dimmer images. Image quality and visual accuracy greatly increased with this invention. Let's take a quick tour through the components of the image intensifier.
With the birth of the image intensifier, radiologists no longer had to adapt their own eyesight to a dim room to look at even dimmer images. Image quality and visual accuracy greatly increased with this invention. Let's take a quick tour through the components of the image intensifier.
- Input screen: A concave surface (to prevent image distortion) with a photocathode. Input phosphors coat the surface.
- Input phosphor: These convert x-ray photons into light photons.
- Photocathode: Made of cesium and antimony. Essentially, light goes in, electrons go out.
- Electrostatic lenses: Along with the anode, these help direct the electrons towards the output screen. The photoelectron beam accelerates and increases in energy until its passes through the anode and hit the output screen.
- Output screen: The electrons are converted into light once more
This whole process greatly improves image quality without significantly increasing radiation dosage. How great is this technology?


Comments
Post a Comment